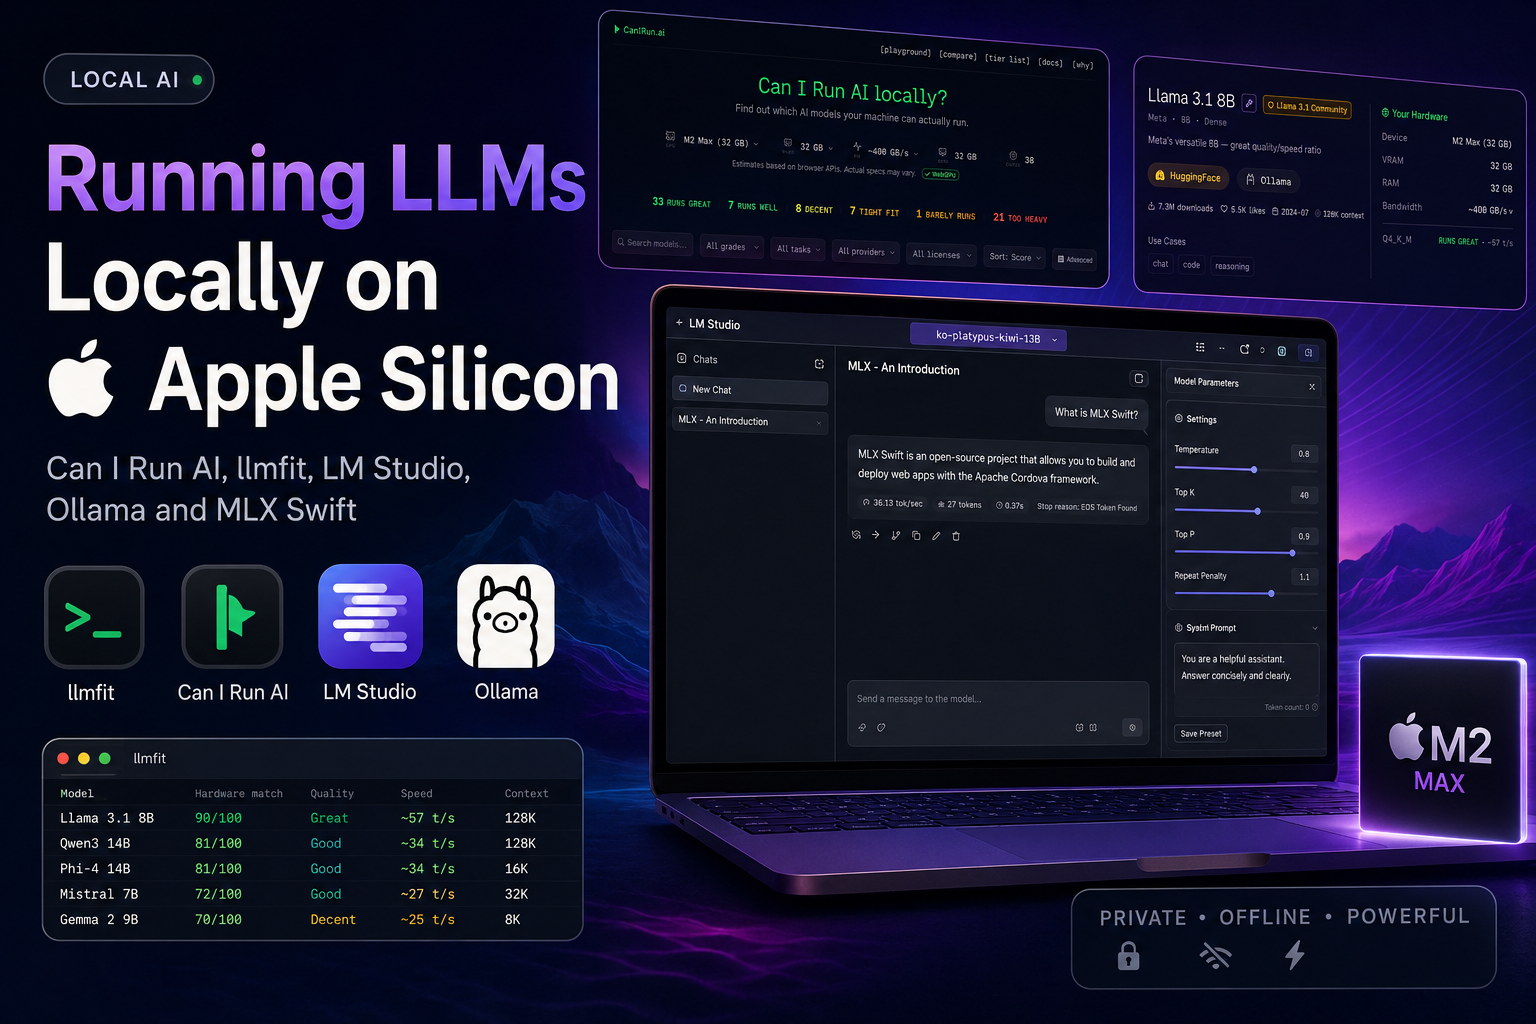
Cloud APIs put a frontier model behind a single HTTPS call. That convenience is hard to beat, and for most production workloads it remains the right choice. But something has shifted over the last couple of years: the gap between “what a hosted model can do” and “what a model running on your laptop can do” has narrowed enough that local inference is no longer a curiosity. For developers, especially those of us building on Apple Silicon, it has become a serious option.
This is the first part of a series on running LLMs locally on Mac. Later parts will dig into Ollama, MLX Swift, and hands-on model experimentation. Here we’ll stay deliberately practical: why you might want to run models locally, how to figure out what your machine can actually handle, what quantization really means once you start browsing model catalogs, and finally a hands-on first run with LM Studio.
Part 1: Why Run AI Locally?
Cloud AI vs Local AI
The two approaches solve the same problem in fundamentally different ways.
| Dimension | Cloud AI | Local AI |
|---|---|---|
| Where inference runs | Provider’s datacenter | Your own machine |
| Where prompts go | Sent over the network | Stay on disk and in RAM |
| Cost model | Per-token, recurring | One-time download, then free |
| Latency | Network round-trip + queueing | Local, bounded by hardware |
| Availability | Requires connectivity and uptime | Works offline |
| Model choice | Whatever the provider exposes | Anything that fits in memory |
| Top-end capability | Frontier models, very large context | Constrained by your hardware |
| Operational burden | None | You manage models, runtimes, updates |
Neither column is strictly better. They’re optimized for different things.
What you gain by going local
A few advantages are obvious; others become clear only after you’ve worked with local models for a while.
- Privacy and data ownership. Prompts, attachments, and intermediate outputs never leave the machine. For anything touching client data, internal code, or unreleased product work, this matters a lot.
- Offline usage. Flights, trains, conference Wi-Fi, sandboxed environments. None of it stops you.
- Lower latency for short prompts. No DNS, no TLS, no provider queue. On Apple Silicon, the first token often appears faster than a typical cloud call.
- No recurring API costs. Once the weights are on disk, you can run a million prompts at no marginal cost beyond electricity.
- Full control over the model. Pick the size, the quantization, the runtime, the sampling parameters. Swap models per task.
- Freedom to experiment. Try fifteen models in an afternoon. Compare them on your own prompts. Break things without worrying about a bill.
- A genuine developer playground. If you’re building features that use LLMs (summarization, classification, code assistance, on-device agents), having a model you can poke at directly shortens the feedback loop dramatically.
What you give up
Honesty is more useful than enthusiasm here.
- Hardware requirements. Models need RAM, and a lot of it. The bigger the model, the more memory you need, and the more pressure you put on the rest of the system.
- Inference speed scales with your machine. A base-model MacBook Air will run small models comfortably, but it won’t match an M-series Max chip on larger ones.
- Large models can be impractical. A 70B-parameter model in full precision is out of reach for most laptops. Even quantized, it asks a lot.
- Choosing the right quantization matters. The same model can run beautifully or terribly depending on which variant you pick. We’ll come back to this.
But before downloading a model, an important question comes up: can your machine actually run it?
Part 2: Discovering Can I Run AI
A common first mistake is downloading a model that sounds impressive, watching it swap to disk, and concluding that local AI “doesn’t work on Mac.” It works. You just picked the wrong model for the hardware.
canirun.ai is a small but genuinely useful tool for avoiding exactly that. You tell it what machine you have, and it tells you which models are realistic.
In practice, it helps you:
- Verify whether a given model is feasible on your hardware
- Filter the catalog so you only see models that fit
- Get a realistic compatibility estimate rather than a marketing claim
- Understand the memory footprint at different quantization levels
- Explore what each model is actually good at
The site has two modes:
- A simplified mode that’s friendly if you’re new to local models
- An advanced mode that surfaces the more technical details: memory estimates, quantization variants, context window, and so on
It’s particularly well-suited to Apple Silicon users because unified memory changes the usual rules of thumb. On a discrete-GPU PC, VRAM is the bottleneck and you compare against that. On a Mac, the GPU shares system memory, so a 32 GB M2 Max can comfortably host models that would be awkward on a 12 GB discrete GPU. Tools that don’t account for this often underestimate what Apple Silicon can do.
A concrete example: MacBook Pro M2 Max, 32 GB
That’s a common, well-balanced developer machine. With 32 GB of unified memory, you can realistically expect:
- 3B to 8B models to run very comfortably, with fast inference and room for a large context window. This is the sweet spot for most everyday tasks.
- 13B models to run well in quantized form (Q4 / Q5), with decent speed.
- 30B to 34B models to be usable in aggressive quantizations (Q3 / Q4), with slower inference and tighter memory headroom.
- 70B models to be out of reach in practice. They fit only in heavily quantized form, leave little room for context, and inference is slow enough that the experience becomes frustrating.
Bigger isn’t automatically better. A well-chosen 8B model that runs fast and leaves headroom for a long context will beat a struggling 30B model for almost every interactive workflow.
The main interface
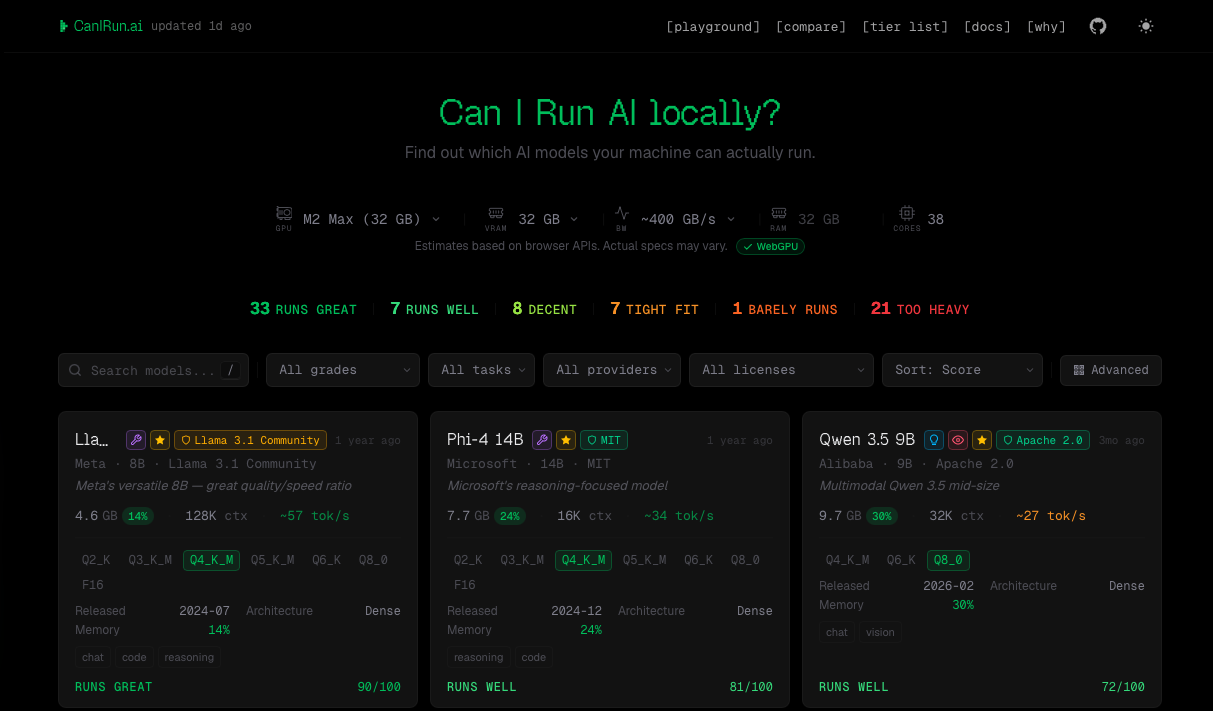
The main interface is deliberately uncluttered. You start by picking your machine. The site has presets for common Apple Silicon configurations as well as PC hardware. From there, every model in the catalog is scored against your setup, so the list is sorted by what’s actually likely to work for you.
You can filter by category (general-purpose, code, vision, small models for edge use, and so on), narrow by size, and quickly see which models are worth your time. The UX leans toward “approachable” rather than “exhaustive,” which suits the use case: you want to make a decision in a couple of minutes, not read a spec sheet.
Model details
Clicking into any model opens a detail view with the information you actually need before downloading:
- Model size (parameter count)
- Context window
- Category (general, code, reasoning, multimodal, etc.)
- An estimated performance level on your machine
- Links to the model on HuggingFace
- Links to the matching Ollama entry where available
- Download counts and community signal
- Release date
It’s the kind of consolidated view you’d otherwise piece together from three or four tabs.
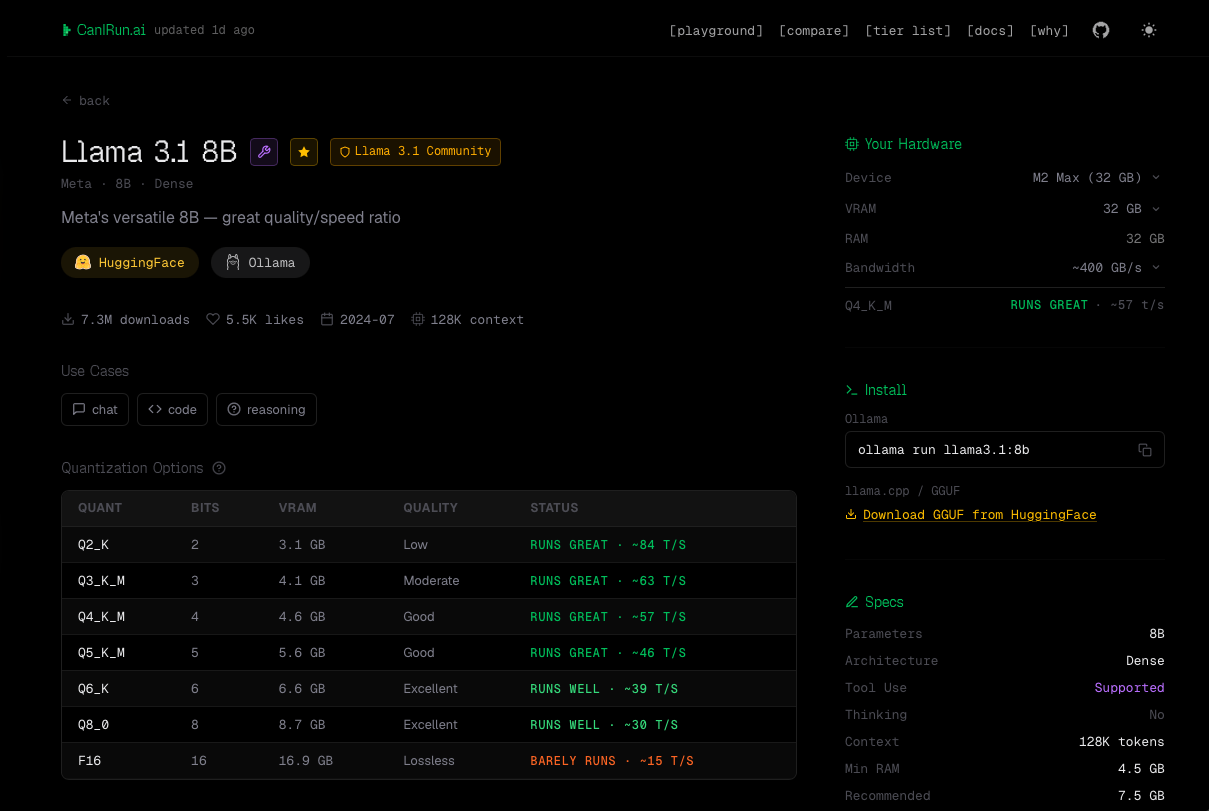
Take Llama 3.1 8B as an example. The detail page summarizes it as:
“Meta’s versatile 8B: great quality/speed ratio.”
Alongside that, you get the HuggingFace and Ollama links, around 7.3M downloads, 5.5K likes, and a 128K context window.
A few of those numbers deserve a translation:
- An 8B model has roughly 8 billion parameters. In rough terms, that puts it in the “small but genuinely capable” tier: fast on modern Macs, strong enough for summarization, classification, drafting, and a lot of everyday developer tasks, but not at the level of frontier hosted models for hard reasoning.
- A 128K context window means the model can attend to about 128,000 tokens at once, long enough to fit a sizable codebase chunk, a full document, or a long conversation. Worth noting: just because the window exists doesn’t mean using it is free. Larger contexts cost more memory and slow inference down, sometimes significantly.
- Quality / speed tradeoff is the lens to keep in mind. An 8B model won’t beat a 70B model on the hardest prompts, but it will respond several times faster and leave room for the rest of your workflow. For interactive tools, that often wins.
Going Further: llmfit for Terminal-First Developers
Can I Run AI is great when you want a quick answer in a browser tab. Once you start caring about the why behind those answers (exact memory footprints, expected throughput, how a given quantization will behave on your specific chip), you eventually want a more technical lens. That’s where llmfit comes in.
It’s worth being upfront about what llmfit is and isn’t. Unlike Can I Run AI, it’s entirely terminal-based and prioritizes technical analysis over UI polish. There’s no friendly card layout, no marketing copy, no animated scoring. The interface is denser and less approachable, and that’s a deliberate tradeoff. In exchange, you get the kind of detail that’s genuinely useful when you’re past the “will it run?” stage and into the “how well, and why?” stage.
If you’re comfortable in a terminal and want deeper performance insights, llmfit pays off quickly. If you’re new to local AI, you’ll probably have a better time starting elsewhere and coming back to this once the questions get sharper.
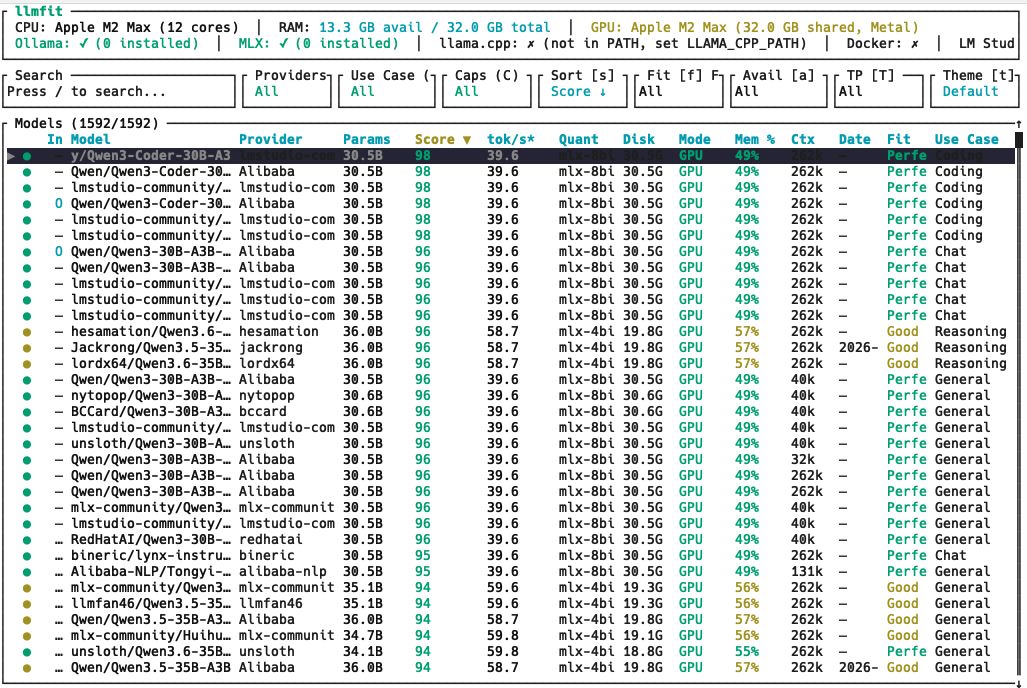
What it actually does
llmfit scores models along several dimensions rather than collapsing everything into a single percentage:
- Model quality: how the model itself stacks up on community evaluations
- Inference speed: expected throughput on your specific hardware
- Hardware suitability: how well the model maps to your chip and memory
- Context window support: whether long-context usage is realistic, not just nominally supported
It detects your environment automatically. On a typical developer setup, that includes:
- NVIDIA GPUs
- AMD GPUs
- Intel Arc GPUs
- Apple Silicon (M-series chips and their unified memory)
- Available system RAM
- CPU capabilities and instruction sets
The detection step is genuinely convenient: you don’t pick a preset, you just run the tool and it figures out what it’s looking at.
Hardware simulation
One feature stands out and is worth highlighting on its own: hardware simulation.
You can ask llmfit to evaluate models as if you were running on a different machine. Curious whether your colleague’s M4 Pro with 48 GB would handle a model that struggles on your M2 with 16 GB? Considering an upgrade and want to know what becomes realistic at 64 GB? Building a feature for a customer whose hardware you know? Simulate the target configuration and get a grounded answer before spending a cent.
For developers shipping LLM-powered features to users on a range of machines, this is unusually useful. Most tools assume you only care about the box you’re sitting at.
Real benchmarks, not just specs
llmfit also aggregates community benchmarks rather than relying purely on theoretical hardware capabilities. The numbers it surfaces include:
- Tokens per second under real inference
- Time to first token (how long before the model starts responding)
- VRAM / unified memory usage during actual runs
Theoretical specs only get you so far. Two chips with the same memory bandwidth on paper can deliver very different inference throughput once you factor in the runtime, the quantization, the context length being used, and how the model is laid out. Real-world numbers from people running the same model on the same hardware cut through that noise. They tell you what to actually expect, not what’s nominally possible.
Runtime integrations
llmfit isn’t trying to be your inference engine. It’s an analysis layer that points at the runtimes you’re likely already using:
- Ollama
- llama.cpp
- MLX (the natural fit on Apple Silicon)
That keeps it useful regardless of how you prefer to actually run models day-to-day.
Installing on macOS
The simplest path on a Mac is via Homebrew:
brew install llmfitThat’s it. If you’d rather build from source or follow the upstream instructions, the repository is at github.com/AlexsJones/llmfit.
Who is this for, honestly
- Beginners will probably get more value out of graphical tools like LM Studio or Can I Run AI. The feedback loop is faster and the friction is lower.
- Advanced developers, particularly those benchmarking models, picking quantizations carefully, or shipping local-AI features to varied hardware, will appreciate llmfit’s precision and terminal-first workflow.
Both kinds of tools have a place. Use whichever matches the question you’re actually trying to answer.
Quantization, in plain terms
Once you start browsing models, you’ll notice the same model listed several times with cryptic suffixes: FP16, Q8, Q6, Q4_K_M, and so on. These are quantizations: different compressed versions of the same underlying weights.
The intuition is straightforward. A model’s weights are numbers. By default they’re stored in relatively high precision (say, 16-bit floats). Quantization stores them in fewer bits (8, 6, 5, 4, sometimes even less), which shrinks the model on disk and in memory. The arithmetic during inference is adjusted accordingly.
This isn’t an MLX-specific idea. The same technique shows up across the ecosystem:
- GGUF files (the format used by
llama.cppand Ollama) - Ollama model variants
- MLX and MLX-community model repositories
- llama.cpp itself
- Various other runtimes and inference engines
The same model can therefore exist in several flavors:
| Variant | Roughly what it means | Typical effect |
|---|---|---|
| FP16 | Full half-precision weights | Largest, highest fidelity |
| Q8 | 8-bit quantization | Much smaller, quality very close to FP16 |
| Q6 | 6-bit quantization | Smaller again, still high quality |
| Q5 | 5-bit quantization | Common middle ground |
| Q4 | 4-bit quantization | Aggressive, popular on consumer hardware |
| Q3 / Q2 | Very aggressive quantization | Smallest, noticeable quality degradation |
The trend is consistent:
- The more aggressive the quantization, the less RAM the model uses.
- Inference often gets faster, because the runtime moves fewer bytes around.
- Quality degrades gradually: usually imperceptible at Q8 or Q6, often acceptable at Q4, increasingly visible below that.
There’s no universally “correct” choice. For an 8B model on a 32 GB Mac, a Q5 or Q6 variant is usually a sweet spot: enough headroom for a long context, fast enough to feel interactive, and quality you’d struggle to distinguish from the full-precision version on most tasks. For a 30B model on the same hardware, you’ll likely need Q4, and you accept the tradeoff because the alternative is not running the model at all.
The honest summary: quantization is what makes local LLMs practical on laptops. Pick the smallest variant that still feels good for your use case, and don’t be afraid to test a couple of options on real prompts before committing.
If you want a deeper, hands-on look at the topic, including how to actually convert and quantize a model yourself using MLX and Hugging Face, see Quantization in LLMs: How to Run AI on Your iPhone Without Burning It.
Part 3: Getting Started with LM Studio
Now that we have a clearer picture of what local AI asks of your hardware and how to figure out which models are realistic, it’s time to actually run one. The easiest place to start, by a comfortable margin, is LM Studio.
At the time of writing, LM Studio is at version 0.4.13 on macOS, with native support for Apple Silicon, including the full M-series lineup. There’s no separate Rosetta build to think about and no GPU drivers to install. You download the app, open it, and you’re roughly five minutes away from your first locally-run conversation.
The reason LM Studio is usually the first tool recommended to newcomers is its UX. Where most of the local-AI ecosystem grew up around terminals and config files, LM Studio offers a polished graphical interface that turns “download and run an LLM” into something close to “download and run any other Mac app.” The mental model is familiar even if the underlying technology isn’t.
If you want to go deeper, I also discussed LM Studio and running LLMs locally on Apple Silicon with Adrien Grondin in a recent podcast episode:
Under the hood, LM Studio pulls models from Hugging Face, the largest open ecosystem for machine learning and LLM distribution. We touched on Hugging Face briefly in the MLX Swift series, but LM Studio hides most of the friction: no Python environment, no manual file management, no hunting through repository directories. You search, you click, you download.
This is also where the tools from the previous sections start to pay off. Before downloading anything from Hugging Face, Can I Run AI or llmfit can tell you whether a given model is realistic on your specific Mac and roughly how much memory it will need. Five minutes of compatibility-checking up front saves a lot of “why is my fan at full speed and the model still loading” later.
Downloading a model
For this walkthrough, we’ll use a Kiwi 13B GGUF model.
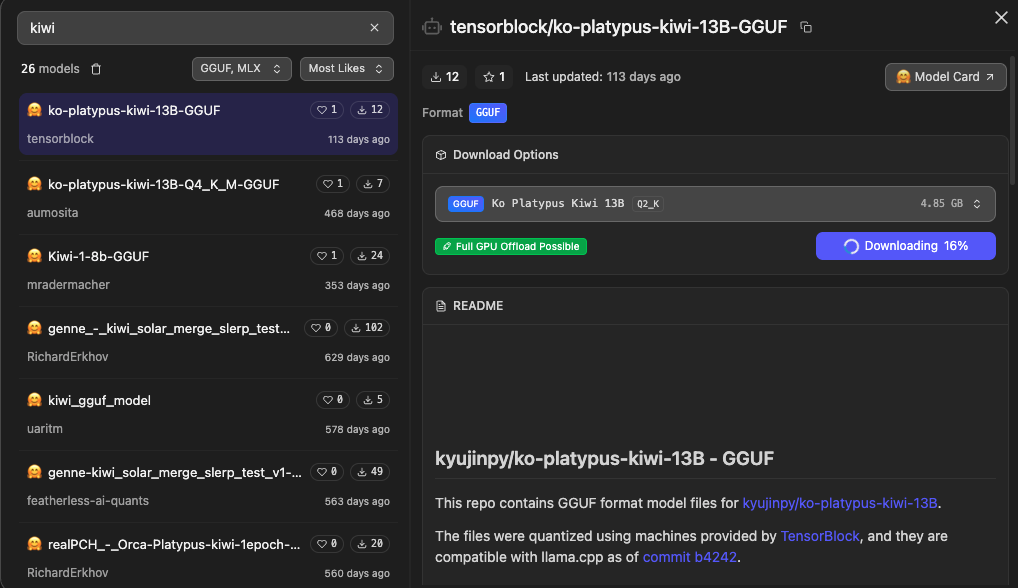
The model name carries more information than it looks. Two parts are worth unpacking.
The “13B” refers to the model’s parameter count: roughly 13 billion. As a rough rule of thumb, larger parameter counts tend to improve reasoning, instruction-following, and text quality. They also require proportionally more RAM and compute. A 13B model is a noticeable step up from 7B/8B in capability, and a noticeable step up in resource usage. On a 32 GB Mac, it’s well within reach in quantized form; on 16 GB, it gets tight.
The “GGUF” is just as important. GGUF is a model file format designed specifically for local inference. It’s used by most of the tools you’re likely to encounter in this space:
- llama.cpp
- LM Studio
- Ollama
- various Apple Silicon-oriented runtimes
GGUF is optimized for local execution and pairs particularly well with quantized models. In practice, when you browse Hugging Face for a model to run on your Mac, you’ll almost always be looking at a GGUF file.
This is where quantization, the topic we covered earlier, stops being theory and starts mattering in a very concrete way. Instead of the full FP16 weights, GGUF models are typically distributed in several quantized variants:
- Q8
- Q6
- Q5
- Q4
Each variant trades a small amount of quality for a meaningful reduction in memory footprint and, often, faster inference. For most everyday use, the quality difference between FP16 and Q5/Q6 is hard to spot in real prompts, while the memory savings make the difference between “runs comfortably” and “doesn’t fit.”
For Apple Silicon users in particular, quantized GGUF models hit a useful sweet spot between:
- Quality: close enough to the full-precision model that most users won’t notice in practice
- Memory usage: small enough to leave headroom for context and the rest of the system
- Inference speed: fast enough to feel interactive on M-series chips
For a 13B model on a 32 GB Mac, a Q4 or Q5 variant is a reasonable default. Start there; you can always re-download a less aggressive quantization later if you find the quality lacking on your prompts.
Starting a chat session
Once the download finishes, LM Studio gets out of your way.
You can jump straight into experimentation by clicking “Use in New Chat”.
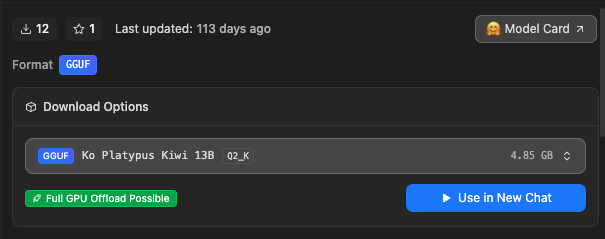
That opens a local chat session running entirely on your machine. No cloud API. No subscription. No remote inference server. The prompt you type goes to a model loaded into your Mac’s unified memory and the response comes back from the same place. Nothing crosses the network. Not even telemetry, if you don’t want it to.
It’s worth pausing on what that actually means. You now have your own local AI assistant, sitting on-device, available offline, and bound only by your hardware. It won’t match a frontier hosted model on the hardest tasks, but for a wide range of practical work (drafting, summarizing, classifying, refactoring, exploring ideas), it’s genuinely useful.
What stands out, especially on modern Apple Silicon, is how unremarkable this has become. Running a 13B model locally with snappy first-token latency would have required workstation-class hardware just a few years ago. Today it runs on a laptop you’d happily carry to a coffee shop, on battery, without anyone noticing the fan. That shift is what makes the local-AI ecosystem worth paying attention to as a developer: not the novelty of any individual tool, but the fact that the floor of what’s reasonable on consumer hardware has moved so far up.
Chatting with the model
Once the chat window is open, the experience feels very close to a hosted assistant. Everything is just happening on your machine.
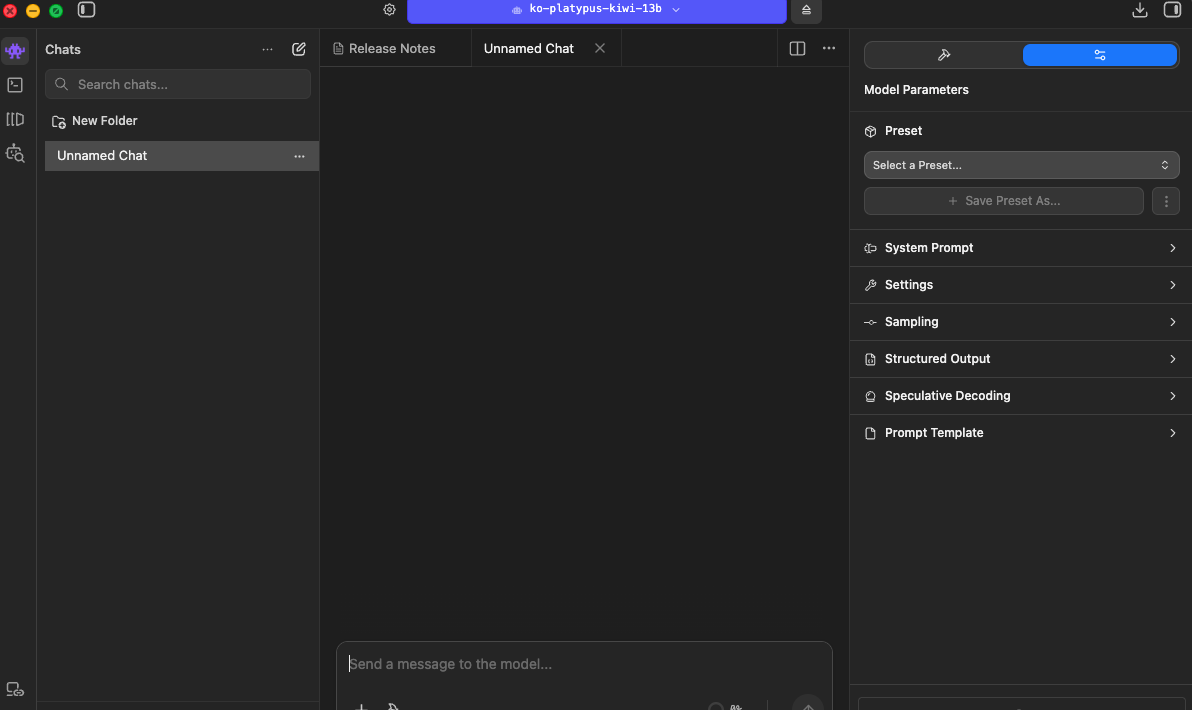
In practice you can do the same things you’d reach for a cloud assistant for:
- ask questions
- generate code
- summarize and rewrite text
- iterate on prompts
- probe reasoning
- evaluate how the model behaves on your own use cases
What sets LM Studio apart from a thin chat wrapper is that it doesn’t hide the knobs most cloud products keep behind their API. The sampling parameters and system instructions that shape every response are surfaced directly in the sidebar.
Understanding model parameters
Modern LLMs aren’t deterministic by default. Their output depends on a handful of sampling parameters that control how the model picks the next token at each step. LM Studio exposes these controls inline.
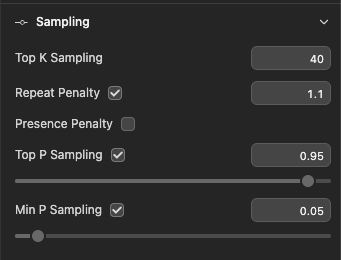
The three you’ll touch most often:
- Temperature: scales the randomness of token selection.
- Top-K sampling: restricts the choice to the K most probable tokens at each step.
- Top-P sampling: restricts the choice to the smallest set of tokens whose cumulative probability exceeds P (also called nucleus sampling).
These get a deeper treatment in Chapter 6 of AI-Driven Swift Architecture, the book series co-authored with Dave Poirier.
For everyday use the pragmatic intuition is enough:
- Lower temperature → more deterministic, predictable output. Good for code generation, classification, structured extraction.
- Higher temperature → more variation and creativity. Good for brainstorming, creative writing, ideation.
- Top-K caps the candidate pool at a fixed number of options. Smaller K means tighter, more conservative output.
- Top-P does the same job dynamically based on probability mass, often producing more natural results than a hard top-K cap.
In practice, these parameters can change the personality of a model as much as the prompt does. The same model at temperature=0.2 and temperature=1.2 behaves like two different assistants. Spending a few minutes finding sane defaults for your use case pays off quickly: low temperature for code, higher temperature for ideation.
System prompts and model instructions
The other lever LM Studio exposes, and arguably the most useful one, is the system prompt.
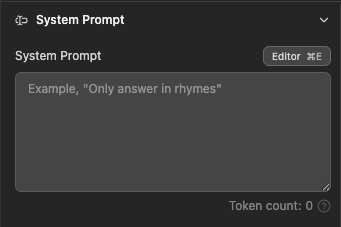
A system prompt is a piece of text the model sees before the conversation starts. It sets the frame: the role, the tone, the constraints, the output format. The same model with two different system prompts will feel like two different tools.
A few examples worth trying:
- “You are a senior iOS engineer. Answer in 2-3 sentences. Prefer Swift 6 idioms. No marketing language.”
- “Only output Swift code, no prose. Include type annotations. Comment only where the intent isn’t obvious.”
- “Explain like a teacher. Build intuition before introducing terminology.”
This is where local experimentation starts to feel genuinely valuable. You can iterate on system prompts as fast as you can type: no API rate limits, no metered tokens, no waiting on a cold endpoint. Combined with a quantized model running on Apple Silicon, you end up with a surprisingly productive environment for prototyping LLM-powered features before committing to a hosted backend.
What’s next
We’ve covered the why of local AI, the how of figuring out what your Mac can handle, the what behind quantization, and a first hands-on run with LM Studio. That’s enough to start exploring on your own.
In the next part, we’ll move from clicking buttons to driving a local model from the command line and from code, starting with Ollama, the most common bridge between “I have a model running” and “I’m using it in a real workflow.”